一、进程与线程简介
进程(Process)
通俗表达就是在计算机内存中运行的一个软件实例,是线程的容器
线程(Threading)
有时被称为轻量级进程(Light Weight Process,LWP),是程序执行流的最小单元。一个标准的线程由线程ID,当前指令指针,寄存器集合和堆栈组成 。线程是进程的一部分,进程可以包含若干个线程。
守护线程(Daemon Thread)
是操作系统中的一种特殊类型的线程,它在后台运行,不阻止程序的终止。当所有的非守护线程(用户线程)结束时,守护线程会自动终止,即使它还在运行。守护线程通常用于执行一些后台任务,如垃圾回收、日志记录等。
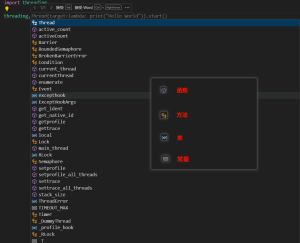
二、Threading模块
threading模块的函数、方法、类、及常量如下图。
![图片[1] - python多线程操作 - 正则时光](https://www.regular.cc/wp-content/uploads/2024/07/image-79-1024x830.png)
Thread类
threading.Thread
类是 Python 中用于创建和管理线程的主要工具。
# 1.线程执行函数,threading.current_thread().name,获取当前线程的名称def worker():print(f'Thread {threading.current_thread().name} is running')# 2.创建线程thread = threading.Thread(target=worker)# thread = threading.Thread(target=worker, args=(10,)) 创建线程并传递参数# thread = threading.Thread(target=worker, name='MyThread') 创建线程并设置名称# thread = threading.Thread(target=worker, daemon=True) 创建守护线程# 3.启动线程thread.start()print(f'Thread is alive: {thread.is_alive()}') # thread.is_alive()获取线程状态# 4.阻塞线程thread.join() # 阻塞调用线程,直到调用join()方法的线程运行终止,才能执行后续程序代码。# 1.线程执行函数,threading.current_thread().name,获取当前线程的名称 def worker(): print(f'Thread {threading.current_thread().name} is running') # 2.创建线程 thread = threading.Thread(target=worker) # thread = threading.Thread(target=worker, args=(10,)) 创建线程并传递参数 # thread = threading.Thread(target=worker, name='MyThread') 创建线程并设置名称 # thread = threading.Thread(target=worker, daemon=True) 创建守护线程 # 3.启动线程 thread.start() print(f'Thread is alive: {thread.is_alive()}') # thread.is_alive()获取线程状态 # 4.阻塞线程 thread.join() # 阻塞调用线程,直到调用join()方法的线程运行终止,才能执行后续程序代码。# 1.线程执行函数,threading.current_thread().name,获取当前线程的名称 def worker(): print(f'Thread {threading.current_thread().name} is running') # 2.创建线程 thread = threading.Thread(target=worker) # thread = threading.Thread(target=worker, args=(10,)) 创建线程并传递参数 # thread = threading.Thread(target=worker, name='MyThread') 创建线程并设置名称 # thread = threading.Thread(target=worker, daemon=True) 创建守护线程 # 3.启动线程 thread.start() print(f'Thread is alive: {thread.is_alive()}') # thread.is_alive()获取线程状态 # 4.阻塞线程 thread.join() # 阻塞调用线程,直到调用join()方法的线程运行终止,才能执行后续程序代码。
也可以自定义线程类,并重写run()
方法。(子类只能重写__init__()和run()方法)
class MyThread(threading.Thread):def run(self):print(f'Thread {self.name} is running')# 创建自定义线程thread = MyThread()thread.start()thread.join()class MyThread(threading.Thread): def run(self): print(f'Thread {self.name} is running') # 创建自定义线程 thread = MyThread() thread.start() thread.join()class MyThread(threading.Thread): def run(self): print(f'Thread {self.name} is running') # 创建自定义线程 thread = MyThread() thread.start() thread.join()
Lock和RLock类
用于线程同步,防止多个线程同时访问共享资源。
Lock
类是最基本的同步原语,提供了一种简单的互斥机制。RLock
类是可重入锁(Reentrant Lock),可以嵌套调用锁定和解锁方法,允许同一个线程多次获取锁而不会阻塞。
区别
- 可重入性:
Lock
是不可重入的,同一个线程不能多次获取同一个Lock
,否则会死锁。RLock
是可重入的,同一个线程可以多次获取同一个RLock
,但每次获取都需要相应的释放。
- 性能:
Lock
通常比RLock
性能稍好,因为它的实现更简单。
- 使用场景:
- 如果需要简单的互斥机制,使用
Lock
。 - 如果同一个线程需要多次获取锁,使用
RLock
。
- 如果需要简单的互斥机制,使用
用法
多线程中,如果多个线程同时执行临界区代码,则可能造成死锁。为了避免死锁,可以用锁来控制临界区代码的访问。只有持有锁的线程才能访问临界区代码。当一个线程获得锁时,其他线程必须等待,直到锁被释放。
import threading# 1.创建锁lock = threading.Lock() # threading.RLock() 创建可重入锁# 2.使用锁# 方法一 加锁、释放锁lock.acquire() # 加锁(获取锁)# 临界区代码lock.release() # 释放锁(释放锁)# 方法二:使用with语句来自动获取和释放锁:with lock:# 临界区代码import threading # 1.创建锁 lock = threading.Lock() # threading.RLock() 创建可重入锁 # 2.使用锁 # 方法一 加锁、释放锁 lock.acquire() # 加锁(获取锁) # 临界区代码 lock.release() # 释放锁(释放锁) # 方法二:使用with语句来自动获取和释放锁: with lock: # 临界区代码import threading # 1.创建锁 lock = threading.Lock() # threading.RLock() 创建可重入锁 # 2.使用锁 # 方法一 加锁、释放锁 lock.acquire() # 加锁(获取锁) # 临界区代码 lock.release() # 释放锁(释放锁) # 方法二:使用with语句来自动获取和释放锁: with lock: # 临界区代码
示例
![图片[2] - python多线程操作 - 正则时光](https://www.regular.cc/wp-content/uploads/2024/07/image-80.png)
Event类
threading.Event
类用于线程间通信。它允许一个线程通知其他线程某个事件已经发生。
用法
import threadingevent = threading.Event() # 使用 Event 类创建一个事件对象。event.set() # 使用 set() 方法设置事件,表示事件已经发生。event.clear() # 使用 clear() 方法清除事件,表示事件未发生。event.wait() # 使用 wait() 方法等待事件发生。如果事件已经设置,wait() 方法会立即返回;否则,线程会阻塞,直到事件被设置。if event.is_set(): # 使用 is_set() 方法检查事件是否已经设置。print("Event is set")import threading event = threading.Event() # 使用 Event 类创建一个事件对象。 event.set() # 使用 set() 方法设置事件,表示事件已经发生。 event.clear() # 使用 clear() 方法清除事件,表示事件未发生。 event.wait() # 使用 wait() 方法等待事件发生。如果事件已经设置,wait() 方法会立即返回;否则,线程会阻塞,直到事件被设置。 if event.is_set(): # 使用 is_set() 方法检查事件是否已经设置。 print("Event is set")import threading event = threading.Event() # 使用 Event 类创建一个事件对象。 event.set() # 使用 set() 方法设置事件,表示事件已经发生。 event.clear() # 使用 clear() 方法清除事件,表示事件未发生。 event.wait() # 使用 wait() 方法等待事件发生。如果事件已经设置,wait() 方法会立即返回;否则,线程会阻塞,直到事件被设置。 if event.is_set(): # 使用 is_set() 方法检查事件是否已经设置。 print("Event is set")
示例
import threading# 创建事件event = threading.Event()def worker():print(f'Thread {threading.current_thread().name} is waiting')event.wait() # 等待事件,当事件event.set()是True时,执行下面的语句,否则被阻塞。print(f'Thread {threading.current_thread().name} is running')thread = threading.Thread(target=worker)thread.start()# 主线程设置事件event.set() # 设置事件,表示事件已经发生thread.join()import threading # 创建事件 event = threading.Event() def worker(): print(f'Thread {threading.current_thread().name} is waiting') event.wait() # 等待事件,当事件event.set()是True时,执行下面的语句,否则被阻塞。 print(f'Thread {threading.current_thread().name} is running') thread = threading.Thread(target=worker) thread.start() # 主线程设置事件 event.set() # 设置事件,表示事件已经发生 thread.join()import threading # 创建事件 event = threading.Event() def worker(): print(f'Thread {threading.current_thread().name} is waiting') event.wait() # 等待事件,当事件event.set()是True时,执行下面的语句,否则被阻塞。 print(f'Thread {threading.current_thread().name} is running') thread = threading.Thread(target=worker) thread.start() # 主线程设置事件 event.set() # 设置事件,表示事件已经发生 thread.join()
在这个示例中,主线程创建了多个工作线程,每个工作线程都会等待事件的发生。主线程在等待一段时间后设置事件,所有等待事件的线程都会被唤醒并继续执行。
Semaphore类
用于控制同时访问某一资源的线程数量。
用法
import threadingsemqueue = threading.Semaphore(5)semqueue.acquire()# 临界区代码semqueue.release()# 或者with semqueue:# 临界区代码import threading semqueue = threading.Semaphore(5) semqueue.acquire() # 临界区代码 semqueue.release() # 或者 with semqueue: # 临界区代码import threading semqueue = threading.Semaphore(5) semqueue.acquire() # 临界区代码 semqueue.release() # 或者 with semqueue: # 临界区代码
示例
import threading# 创建信号量,初始计数值为2semaphore = threading.Semaphore(2)def worker(num):with semaphore:print(f'Thread {threading.current_thread().name} is running with num={num}')# 模拟工作时间threading.Event().wait(1)threads = [threading.Thread(target=worker, args=(i,)) for i in range(5)]for thread in threads:thread.start()for thread in threads:thread.join()import threading # 创建信号量,初始计数值为2 semaphore = threading.Semaphore(2) def worker(num): with semaphore: print(f'Thread {threading.current_thread().name} is running with num={num}') # 模拟工作时间 threading.Event().wait(1) threads = [threading.Thread(target=worker, args=(i,)) for i in range(5)] for thread in threads: thread.start() for thread in threads: thread.join()import threading # 创建信号量,初始计数值为2 semaphore = threading.Semaphore(2) def worker(num): with semaphore: print(f'Thread {threading.current_thread().name} is running with num={num}') # 模拟工作时间 threading.Event().wait(1) threads = [threading.Thread(target=worker, args=(i,)) for i in range(5)] for thread in threads: thread.start() for thread in threads: thread.join()
信号量的工作原理
信号量的计数值表示可以同时访问资源的线程数量。当一个线程进入临界区时,信号量的计数值减一;当线程离开临界区时,信号量的计数值加一。如果信号量的计数值为零,则试图进入临界区的线程将被阻塞,直到有其他线程释放信号量。
使用信号量控制并发
通过调整信号量的初始计数值,可以控制同时访问某一资源的线程数量。例如,如果将初始计数值设为1,则信号量将起到互斥锁的作用,一次只允许一个线程访问资源。
三、线程池ThreadPoolExecutor
concurrent.futures.ThreadPoolExecutor
是 Python 标准库中用于管理线程池的工具。它允许你并发地执行任务,而无需手动管理线程的创建和销毁。
from concurrent.futures import ThreadPoolExecutor # 导入ThreadPoolExecutor模块。import timedef worker(num):print(f'Thread {num} is running')time.sleep(2)return f'Thread {num} is done'# 创建线程池# 方法一 submit()方法with ThreadPoolExecutor(max_workers=3) as executor:# 提交任务futures = [executor.submit(worker, i) for i in range(5)]# 获取结果for future in futures:print(future.result())# 方法二 使用 map() 方法with ThreadPoolExecutor(max_workers=3) as executor:results = executor.map(worker, range(5))# 获取结果for result in results:print(result)from concurrent.futures import ThreadPoolExecutor # 导入ThreadPoolExecutor模块。 import time def worker(num): print(f'Thread {num} is running') time.sleep(2) return f'Thread {num} is done' # 创建线程池 # 方法一 submit()方法 with ThreadPoolExecutor(max_workers=3) as executor: # 提交任务 futures = [executor.submit(worker, i) for i in range(5)] # 获取结果 for future in futures: print(future.result()) # 方法二 使用 map() 方法 with ThreadPoolExecutor(max_workers=3) as executor: results = executor.map(worker, range(5)) # 获取结果 for result in results: print(result)from concurrent.futures import ThreadPoolExecutor # 导入ThreadPoolExecutor模块。 import time def worker(num): print(f'Thread {num} is running') time.sleep(2) return f'Thread {num} is done' # 创建线程池 # 方法一 submit()方法 with ThreadPoolExecutor(max_workers=3) as executor: # 提交任务 futures = [executor.submit(worker, i) for i in range(5)] # 获取结果 for future in futures: print(future.result()) # 方法二 使用 map() 方法 with ThreadPoolExecutor(max_workers=3) as executor: results = executor.map(worker, range(5)) # 获取结果 for result in results: print(result)
ThreadPoolExecutor 和 Semaphore的区别
- 用途:
ThreadPoolExecutor
用于并发执行多个任务,管理线程池。Semaphore
用于控制并发访问某个资源的线程数量。
- 使用场景:
ThreadPoolExecutor
适用于需要并发执行多个任务,且任务之间相对独立的场景。Semaphore
适用于需要限制同时访问某个资源的线程数量的场景,例如数据库连接池、文件读写等。
- 功能:
ThreadPoolExecutor
提供了任务提交和结果获取的功能,自动管理线程池。Semaphore
提供了信号量的获取和释放功能,用于并发控制。